 By Emily Parker
Updated November 2026
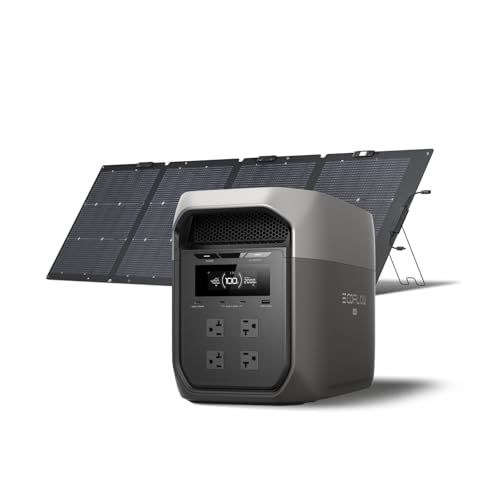
An ecoflow solar charge cable links your solar panels to your EcoFlow power station so the battery can recharge from sunlight during an outage or off-grid stay. In this guide you will learn how to identify the right cable for your panels, check voltage and current limits, connect everything in the correct order, and spot the mistakes that most often cause slow charging or damaged gear.
What an EcoFlow Solar Charge Cable Does
A solar charge cable carries direct current (DC) from the panel to the power station’s solar input port. The power station’s charge controller then regulates that power to the battery. The cable itself does not convert or store energy; it simply has to handle the voltage and current the panel produces without losing too much along the way.
Shopping for one? See our guide: 5 Best EcoFlow Solar Parallel Connection Cables Compared (2026).
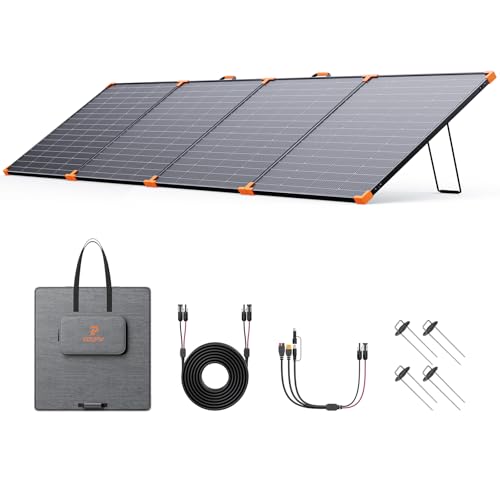
Most EcoFlow units use an XT60-style or proprietary input on the power station side, and MC4 connectors on the panel side. That is why you will often see the phrase “MC4 to XT60” in product listings. Some models, particularly older or smaller units, use a different barrel or proprietary input, so always confirm the port on your specific model before buying.
Step 1: Confirm Your Power Station’s Solar Input Specs
Before you touch a cable, look up the solar input limits in your power station’s manual or spec sheet. The three numbers that matter most are:
- Maximum input voltage (Voc): The highest open-circuit voltage the port can accept. Exceeding this can damage the controller.
- Maximum input power (W): The total wattage the unit can accept from solar.
- Maximum input current (A): The amperage the port and cable should handle.
Manufacturers specify these values for each model. If your panel’s open-circuit voltage is close to the port’s maximum, plan for cold-weather voltage rise, since panel voltage increases as temperature drops.
Step 2: Match the Cable to Your Panels
Check the connectors on your solar panels. Most modern panels use MC4 connectors. If your panels have MC4 leads and your power station uses an XT60-style input, you need an adapter cable. If your panels use a different connector, such as an Anderson-style plug or bare leads, you will need a different adapter or a termination you can safely make yourself.
For a deeper look at the connector types and pairings, see EcoFlow Solar Panel Cables: How to Choose and Connect the Right Ones. If you are working with an MC4-to-XT60 adapter specifically, EcoFlow MC4 to XT60 Solar Cable: Step-by-Step Wiring Guide walks through the connection in detail.
Checklist before you buy
- Power station model and its solar input port type
- Panel connector type (MC4, Anderson, bare leads, or other)
- Panel open-circuit voltage (Voc) and rated power (W)
- Required cable length, measured from panel to power station
- Wire gauge rated for the expected current
Step 3: Calculate Voltage and Current Margins
A quick calculation helps you avoid overloading the input. Multiply the number of panels in series by each panel’s Voc. Compare that total to the power station’s maximum input voltage. Then check the current: divide the panel’s rated wattage by its voltage to estimate amps, and make sure the total stays under the input’s amperage limit.
| Check | How to calculate | What to look for |
|---|---|---|
| Series voltage | Panel Voc × number of panels in series | Below the power station’s maximum input voltage |
| Current per string | Panel watts ÷ panel Vmp | Below the port’s maximum input current |
| Total input power | Sum of all panel watts | Within the unit’s stated solar input wattage |
| Cable length loss | Longer runs and thin wire increase voltage drop | Keep runs short and use adequate wire gauge |
If any check fails, reduce the number of panels per string or change the series-parallel arrangement. A licensed electrician can help if you are unsure how to size the system.
Step 4: Connect the Cable Correctly
- Turn off the power station and disconnect any loads.
- Cover the solar panels with an opaque sheet so they produce little or no voltage while you connect.
- Connect the adapter end to the power station’s solar input port first. Make sure the connector is fully seated.
- Connect the MC4 (or other) end to the panel. Listen and feel for the locking click.
- Remove the cover from the panels and confirm the power station shows solar input on its display.
- Watch the reported input watts for several minutes. Readings should rise as the sun strengthens.
When you disconnect, reverse the order: cover the panels, disconnect the panel end, then the power station end. Always keep connectors dry and clean.
Step 5: Confirm Charging Is Working
Once connected, check three things: the solar input wattage on the display, the battery percentage trend over time, and whether the unit reports any fault code. Output from solar varies with sun angle, shading, temperature and panel orientation, so readings will not stay flat. If the input shows zero under full sun, re-check the connectors, panel switch or cable continuity.
If charging is unusually slow or the battery will not hold a charge, see Solar Generator Battery Not Holding Charge? Causes and Checks for a list of common causes.
Tips for Using Your Solar Charge Cable Safely
- Route cables away from walkways, sharp edges and standing water.
- Secure cable runs so they cannot be pulled out by wind or foot traffic.
- Inspect insulation and connectors monthly for cracks, melted plastic or corrosion.
- Use only the cable and adapter type your power station manufacturer specifies.
- Keep the power station in a ventilated spot, not inside a closed cabinet.
Common Mistakes to Avoid
- Exceeding the maximum input voltage. Cold mornings can push open-circuit voltage above the label figure. Leave a safety margin.
- Using undersized wire. Thin wire over a long run causes voltage drop and heat. Choose a gauge rated for the current.
- Mixing connector types. Forcing an MC4 into a non-MC4 port or using unrated adapters can cause arcing.
- Connecting live. Plugging in while panels are in full sun creates a spark risk. Cover the panels first.
- Ignoring the manual. Each power station has its own limits, and the manual is the authority.
- Assuming a longer cable is harmless. Extra length adds resistance and reduces the power that reaches the battery.
Recommended gear
A few supplies make setup and troubleshooting easier.
- Multimeter: Lets you measure open-circuit voltage at the panel and confirm the cable is delivering power. Owners often use one to verify a new cable before connecting to the power station. View on Amazon
- MC4 crimping and disconnect tool: Useful if you need to build or repair a panel-side lead. Use only tools rated for MC4 connectors. View on Amazon
- Outdoor-rated extension cable: If you need extra reach, choose a cable with UV-resistant jacketing and a gauge suited to your current. View on Amazon
- Cable clips and UV-resistant ties: Keep runs secured and off the ground. View on Amazon
FAQ
Can I use any MC4 cable with my EcoFlow power station?
Not always. The panel side may be MC4, but the power station end must match its solar input port. Most EcoFlow units require a specific adapter or cable, so check your model’s manual before buying.
Why does my solar input show less than the panel’s rated wattage?
Rated wattage is measured under standard test conditions. Real output depends on sun angle, temperature, shading, dust and cable losses. Lower readings are normal in many conditions.
Is it safe to connect solar panels while they are in sunlight?
It is safer to cover the panels first. Panels produce voltage whenever light hits them, so connecting in full sun increases the risk of sparks and connector damage.
How long should a solar charge cable be?
Use the shortest length that reaches comfortably. Longer runs increase voltage drop and heat. If you need a long run, choose a heavier gauge wire.
Can I connect two panels to one cable?
You can, but only if the combined voltage and current stay within the power station’s limits. Series and parallel arrangements change those totals, so calculate before connecting.
What wire gauge should I use?
The right gauge depends on current and run length. Shorter runs with modest current can use thinner wire, while longer or higher-current runs need thicker wire. Check the cable manufacturer’s rating and consult an electrician if unsure.
My cable gets warm during charging. Is that a problem?
Slight warmth can be normal, but a hot connector, melted insulation or a burning smell is not. Disconnect the cable, let it cool, and inspect for loose fittings or undersized wire. A qualified electrician should check any persistent heating.
Conclusion
A correct ecoflow solar charge cable depends on matching connectors, staying inside the power station’s voltage and current limits, and connecting in the right order. Confirm the specs in your manual, do the basic calculations, and inspect the cable regularly. With the right setup, your battery will charge reliably whenever the sun is out.
Related reading
- Top 4 EcoFlow Solar Extension Cables Compared for Home Backup
- Ecoflow Mc4 to Xt60i Solar Cable: A Practical Guide (2026)
- EcoFlow Solar to XT60 Charging Cable: Step-by-Step Setup Guide
Ready to choose one?
About Emily Parker
Emily Parker is part of our editorial team and reviews and edits our solar generators for home backup & emergencies guides, checking product details against manufacturer specifications and owner feedback.