 By Emily Parker
Updated November 2026
An EcoFlow solar to XT60 charging cable links a solar panel’s output to the XT60 input on an EcoFlow power station, so you can recharge the battery from sunlight. By the end of this guide, you will know what the cable does, how to confirm you need one, how to check polarity and voltage before connecting anything, and how to avoid the mistakes that cause slow charging or damaged connectors.
What the EcoFlow Solar to XT60 Cable Does
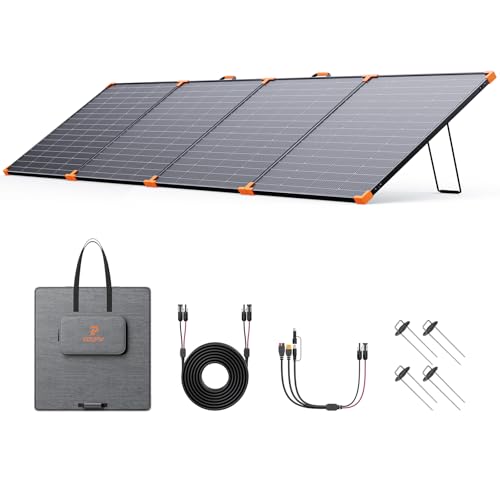
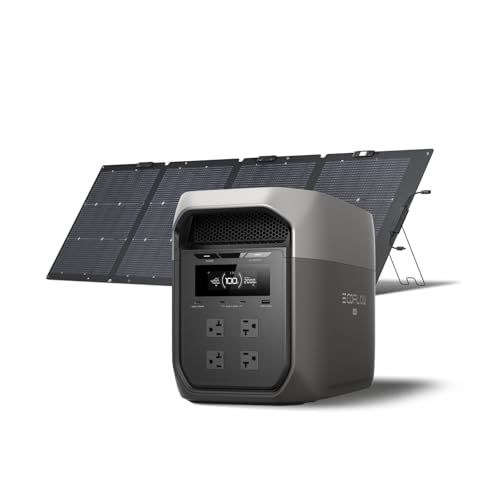
Most EcoFlow power stations accept solar input through a DC port that uses the XT60 connector, a rated, keyed plug designed for higher current than typical barrel plugs. Portable panels, however, often finish in MC4 connectors or proprietary plugs. A solar to XT60 cable bridges that gap. It takes the panel’s output and terminates it in an XT60 plug that seats into the power station.
Shopping for one? See our guide: 5 Best EcoFlow Solar Parallel Connection Cables Compared (2026).
The cable does not change the electrical output of the panel. It only carries the power across. That means the charging speed you get depends on the panel’s wattage, the sun’s angle and intensity, the power station’s solar input limit, and the cable’s wire gauge and length. If you are still choosing hardware, the guide on EcoFlow MC4 to XT60 Solar Cable: Step-by-Step Wiring Guide covers the most common adapter type in detail.
Check Compatibility Before You Buy or Wire
Matching the cable to your gear is the most important step. Work through this checklist first:
- Find your power station’s solar input spec. Look in the product manual or spec sheet for the maximum solar input wattage and voltage range. Some models accept a wide voltage window, while others are narrower.
- Identify the panel’s output connector. Common types include MC4, Anderson-style plugs, or a proprietary EcoFlow connector. Check the panel’s label or manual.
- Confirm the XT60 side is XT60, not a similar plug. XT60 and XT90 connectors look alike but are not interchangeable. Confirm the part number on the power station or in its manual.
- Check polarity. Positive and negative must match on both ends. Reversed polarity can damage the charge controller and void warranties.
- Note the cable gauge and length. Longer runs and thinner wire lose more power as heat. Manufacturers typically specify a maximum recommended length for a given gauge.
Understanding Voltage and Current Limits
A panel’s open-circuit voltage (Voc) rises in cold weather. Always compare the panel’s Voc against the power station’s maximum input voltage, not its nominal rating. A panel that reads close to the limit on a cold morning may exceed it. The table below shows a simple way to organize these numbers before you connect anything.
| Item to check | Where to find it | Why it matters |
|---|---|---|
| Max solar input watts | Power station spec sheet | Panels above this rating will not charge faster |
| Input voltage range | Power station spec sheet | Outside this range the unit may reject input or fault |
| Panel Voc (cold) | Panel label or datasheet | Voc rises in cold, so check the high-end figure |
| Cable gauge | Cable packaging or label | Thicker wire carries more current with less loss |
| Connector type | Physical inspection | Mismatched connectors force unsafe adapters |
How to Connect the Cable Step by Step
Follow these steps in order. Doing them out of sequence is one of the most common causes of problems.
- Turn off the power station. Make sure no AC or DC loads are drawing power.
- Place the panel in its final position. Shade, dirt, and loose mounting can all reduce output, so set it up before wiring.
- Connect the panel end first. Attach the panel’s output connector to the solar to XT60 cable, and make sure the connection is fully seated.
- Connect the XT60 end to the power station. Align the keyed plug, press it in until it clicks or seats firmly, and avoid forcing it.
- Turn the power station on and check the display. Most units show solar input watts. Confirm a reading appears within a few minutes of good sun.
- Watch the first 15 to 30 minutes. Input should rise as the sun strengthens, then level off. Erratic readings, heat at connectors, or error codes mean you should disconnect and investigate.
Disconnecting Safely
Disconnect in reverse order: unplug the XT60 end from the power station first, then the panel end. Keeping the panel disconnected from the power station while handling the cable reduces the chance of an arc.
Tips for Faster, Safer Solar Charging
- Keep the panel perpendicular to the sun when you can. Even a 20 to 30 degree misalignment can noticeably cut output.
- Use the shortest cable run that is practical, and avoid coiling excess cable tightly, which can add heat.
- Inspect XT60 pins for discoloration or looseness every few uses. Heat marks are a warning sign.
- Keep connectors out of standing water and dust. Manufacturers often recommend dry, clean connections.
- If the cable runs outdoors for long periods, check that it is rated for UV and temperature extremes.
Common Mistakes
- Reversing polarity. Always verify positive and negative on both ends before plugging in.
- Ignoring cold-weather Voc. A panel that seems safe in summer can exceed input limits on a frosty morning.
- Using a thin extension. A long, thin cable can cap your charging speed far below the panel’s rating.
- Mixing up XT60 and XT90. Forcing a plug into the wrong port can damage pins.
- Stacking adapters. Each extra connector adds resistance and a point of failure. Use one well-made cable where possible.
- Assuming full panel output reaches the battery. Limits on the power station, temperature, and shading all reduce the real charge rate. For troubleshooting slow charging, see Why Is My Solar Generator Charging Slowly? Causes and Fixes.
Recommended gear
A purpose-built cable with the correct connector and gauge will serve you better than improvised wiring. Consider these options when shopping:
- EcoFlow solar cable with XT60 output: Designed for EcoFlow’s input port, so connector fit and polarity follow the manufacturer’s spec. View on Amazon
- MC4 to XT60 adapter cable: Useful when your panel uses standard MC4 connectors and your power station uses XT60. View on Amazon
- Solar extension cable with correct gauge: A heavier-gauge extension helps when the panel must sit far from the power station. View on Amazon
FAQ
Can I use any XT60 cable to charge my EcoFlow from solar?
Not necessarily. The cable must match your panel’s connector on one end and your power station’s solar input on the other, with correct polarity and a gauge suited to the current. Check the manual before substituting.
Why does my solar input show a low number?
Common causes include partial shading, a panel tilted away from the sun, a long or thin cable, dirty panel glass, or early or late sun. Temperature also affects panel output.
Is an XT60 connector the same as an XT90?
No. They look similar but have different current ratings and are not interchangeable. Use the connector specified for your power station’s input.
Can I leave the cable connected all day?
Many owners do, but you should check connectors periodically for heat or looseness. Disconnect the cable if you notice any discoloration or fault codes.
What happens if I connect the panel with reversed polarity?
Reversed polarity can damage the charge controller or input circuitry. Stop immediately if you suspect reversed wiring and verify the connection before trying again.
Does cable length affect charging speed?
Yes. Longer runs and thinner wire lose more power as resistance and heat. Keep runs as short as practical and use a gauge appropriate for the length.
Should I consult a professional for wiring?
If you are unsure about voltage limits, polarity, or permanent installation, consult a qualified electrician or solar installer. Portable setups are generally simpler, but mistakes can still damage equipment.
Conclusion
An EcoFlow solar to XT60 charging cable is a simple bridge, but it works best when you match connectors, confirm polarity, and respect voltage limits. Check your power station’s solar specs, confirm the panel’s cold-weather Voc, and connect in the right order. If charging stays slow or the connection runs warm, step through the checks above before assuming the hardware has failed.
Related reading
- Ecoflow Delta 2 Maximum Solar Input: How Much Solar It Accepts and How to Use It
- Ecoflow 400w Portable Solar Panel: 5 Best Picks Compared (2026)
- Ecoflow 220w Bifacial Solar Panel: Specs, Sizing and Setup Tips
- EcoFlow Solar Panel Connector: How to Wire Panels Safely (2026)
Ready to choose one?
About Emily Parker
Emily Parker is part of our editorial team and reviews and edits our solar generators for home backup & emergencies guides, checking product details against manufacturer specifications and owner feedback.