 By Graham Fisher
Updated November 2026
A do it yourself solar power generator is a battery, inverter and solar panel setup you assemble from separate parts instead of buying a finished power station. This guide walks through sizing the system to your loads, picking compatible components and wiring them in a safe order. The goal is a setup that can run a fridge, a router and a few lights through an outage. If you are new to the idea, it helps to first read Using a Solar Generator During a Power Outage: A Practical Plan for context on what a backup system really needs to do.
Step 1: Calculate Your Daily Energy Needs
Start with the appliances you want to keep running and find the watt-hours each one uses per day. Multiply the wattage by the hours of use. A refrigerator that averages 150 watts and runs about 10 hours a day consumes roughly 1,500 watt-hours, though compressors cycle, so check the appliance’s energy label or a plug-in meter for a real figure. For a more systematic approach, see How to Measure Appliance Power Consumption for Solar Generator Sizing.
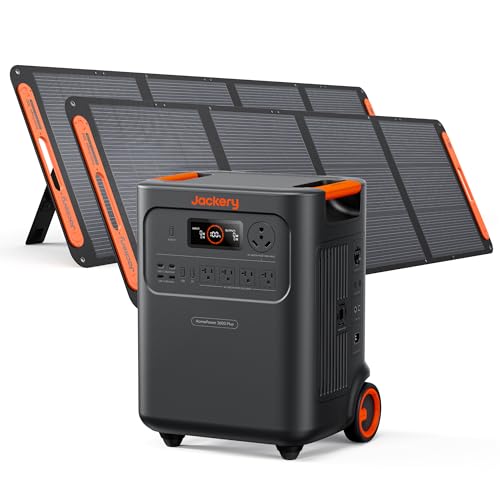
Shopping for one? See our guide: Jackery Solar Generator Home Power 3000: 4 Best Options Compared (2026).
Add a 20 percent margin to your total to cover inverter losses and battery aging. Then decide how many days of backup you want. Most people plan for one to two days of autonomy.
Step 2: Size the Battery Bank
Battery capacity in watt-hours equals your daily need multiplied by the days of backup, divided by the usable depth of discharge. Lithium iron phosphate batteries are commonly rated for around 80 percent usable capacity, so a 3,000 Wh daily need with one day of backup would call for roughly 3,750 Wh of nominal capacity. Confirm the depth-of-discharge figure in the battery manufacturer’s specifications.
Note the difference between surge and continuous ratings. Motors, such as a well pump or sump pump, can draw several times their running wattage at startup. The inverter must handle that surge. See Surge vs Continuous Power: What Your Solar Generator Can Actually Start before you pick an inverter.
Step 3: Choose and Size Solar Panels
Panels should replenish the battery within a reasonable window. Divide your daily watt-hour need by the peak sun hours at your location, which you can look up for your region, then add losses for temperature, angle and wiring. In many parts of the US, that works out to a panel array roughly two to three times the size of your daily load in watts. Keep the array sized so the charge controller’s maximum input voltage and current are not exceeded.
Step 4: Assemble and Wire in Order
- Mount the panels facing the sun at a tilt suited to your latitude, with a secure, weather-rated frame.
- Connect panels to the charge controller first, matching series and parallel configurations to its voltage and current limits.
- Connect the charge controller to the battery, with a fuse or breaker on the positive line close to the battery.
- Connect the inverter to the battery last, again with a fuse sized to the inverter’s maximum current draw.
- Power up the system with all loads off, then add loads one at a time while watching voltage.
Common Mistakes to Avoid
- Ignoring surge ratings, which trips the inverter the moment a pump or compressor starts.
- Undersizing wire gauge, which causes voltage drop and heat at high current.
- Skipping fuses or breakers, which removes the main protection against short circuits.
- Assuming panels deliver their nameplate rating all day; real output depends on sun angle and weather.
- Connecting the inverter to household wiring without a transfer switch, which can backfeed the grid and endanger utility workers.
Recommended Gear
- Solar charge controller: regulates panel output to protect the battery from overcharging. View on Amazon
- Pure sine wave inverter: provides clean power suitable for sensitive electronics and motors. View on Amazon
- Plug-in watt meter: helps you measure real appliance consumption before you finalize your sizing. View on Amazon
FAQ
Is a do it yourself solar power generator cheaper than a finished unit?
It can be, but the savings depend on your skill, the components you choose and whether you need professional installation. Compare the full cost of parts and tools against a ready-made power station before deciding.
Can I connect my DIY system to my home wiring?
Connecting to home circuits generally requires a transfer switch installed by a licensed electrician. Improper connections can backfeed the grid and create serious hazards, so consult a professional.
How long will a DIY solar generator run during an outage?
Runtime depends on battery capacity, your daily load and how much sun the panels receive. Divide usable battery watt-hours by your average hourly load to estimate runtime under no sun.
Conclusion
A do it yourself solar power generator comes down to matching battery capacity, panel output and inverter rating to the loads you actually need. Measure your appliances first, then size each component with a safety margin. Wire the system in order, protect every connection with fuses or breakers, and test it under load before you rely on it during an outage.
Related reading
Ready to choose one?
About Graham Fisher
Graham Fisher is part of our editorial team and reviews and edits our solar generators for home backup & emergencies guides, checking product details against manufacturer specifications and owner feedback.