 By Graham Fisher
Updated November 2026
A jackery solar panel adapter lets you connect third-party solar panels to a Jackery power station when the panel’s output connector does not match the input port on the station. In this guide you will learn how to identify the right adapter, check voltage and current limits before connecting anything, wire the setup in the correct order, and confirm that the system is charging as expected. The steps apply to most Jackery portable power stations paired with standard portable panels.
What a Jackery Solar Panel Adapter Actually Does
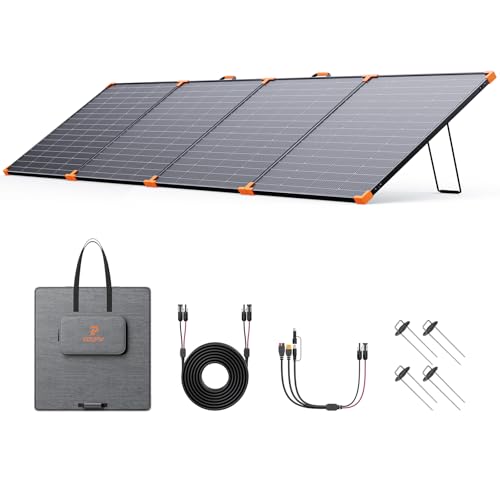
Most portable solar panels use MC4-style connectors or a proprietary plug, while Jackery stations use their own solar input port designed for specific Jackery panels. An adapter bridges that gap by converting the physical connector and passing the panel’s DC output into the station. It does not change voltage or current. The adapter is only a connector, so the panel’s open-circuit voltage and maximum power still have to fall within the station’s solar input range.
Shopping for one? See our guide: 4 Best Jackery 1500 V2 With Solar Panel Options for Home Backup (2026).
This is the single most important point. An adapter makes a connection possible, but it cannot make an incompatible panel safe. Before buying or using any adapter, confirm the panel’s specifications against the station’s manual.
Step 1: Check the Station’s Solar Input Limits
Start with the power station’s manual or the product page from the manufacturer. Look for three numbers: the maximum input voltage (often listed as open-circuit voltage, or Voc), the operating voltage range, and the maximum solar input wattage. Manufacturers specify these values because exceeding them can damage the charge controller.
Write these numbers down. You will compare them directly against the panel label in the next step.
Step 2: Read the Panel’s Electrical Label
Every solar panel has a label on the back listing Voc (open-circuit voltage), Vmp (voltage at maximum power), Isc (short-circuit current), Imp (current at maximum power), and rated wattage. Compare these figures to the station’s limits.
- Voc must stay below the station’s maximum input voltage even on the coldest day you expect. Cold weather raises Voc, so do not rely only on the room-temperature rating.
- Vmp should fall inside the station’s operating voltage range so the charge controller can track maximum power.
- Isc should not exceed the station’s maximum input current per port.
- Total wattage of connected panels should match the station’s rated solar input, not exceed it by a large margin.
If any of these checks fail, do not connect the panel, adapter or not.
Step 3: Choose the Correct Adapter Type
Adapters generally fall into a few types. Identify the connector on your panel first, then the input on the station, and select an adapter that matches both ends.
| Panel Connector | Station Input | Adapter Type to Look For |
|---|---|---|
| MC4 (standard) | Proprietary solar port | MC4-to-station adapter or MC4 extension with matching plug |
| Proprietary Jackery plug | Different Jackery model | Confirm compatibility in the manual before buying |
| Barrel or XT60-style | DC input | Barrel or XT60 adapter with correct polarity |
Polarity matters. Reversed polarity can damage electronics. Check that positive and negative are labeled and that the adapter maintains the same orientation as the original connector.
Step 4: Gather Tools and Supplies
You will not need specialized equipment for most setups, but having the right items on hand prevents rushed mistakes.
- A multimeter to verify open-circuit voltage before connecting
- The panel’s spec label and the station manual
- The adapter, matched to both connectors
- An MC4 crimping or disconnect tool if you need to modify cable ends (only if you are comfortable with this work)
- Cable ties or a cable management clip to keep runs off walkways
- Gloves, since panels under sun can deliver dangerous voltage
Step 5: Wire the System in the Correct Order
Connection order reduces the risk of arcing and damaged connectors.
- Cover the panel. Place a dark cloth or the panel’s protective cover over it so it produces little or no voltage while you work.
- Confirm the station is off or in standby and the solar input switch is off, if the model has one.
- Measure Voc with the multimeter at the panel’s output leads. Confirm it is below the station’s maximum input voltage.
- Attach the adapter to the panel cable first. Keep the other end disconnected from the station.
- Connect the adapter to the station’s solar input. Push the connector until it seats fully.
- Uncover the panel in direct sun and turn the station on or enable solar charging.
- Verify charging on the station’s display or app. Input wattage should rise as the sun strengthens.
To disconnect, reverse the order: cover the panel, disconnect the station end, then disconnect the panel end.
Step 6: Confirm Performance and Expected Charging Time
Real-world input is almost always lower than the panel’s rated wattage. Clouds, panel angle, temperature, shading and dust all reduce output. Expect the station to show fluctuating input throughout the day. For a rough estimate, divide the battery’s watt-hours by the average solar input you observe, then add a margin for losses. Our guide on How Long Does It Take to Charge a Solar Generator With Solar Panels? walks through this calculation in detail.
Angle the panel toward the sun for the best results. In the Northern Hemisphere, that generally means facing south, and tilting it roughly equal to your latitude can improve winter output.
Common Mistakes to Avoid
- Assuming an adapter means compatibility. The adapter only fixes the connector. Voltage and current limits still apply.
- Ignoring cold-weather voltage rise. A panel that is safe on a warm afternoon can exceed the station’s maximum input voltage on a cold morning.
- Connecting the station end first. This leaves bare, live leads exposed while you handle the panel side.
- Mixing panels of different specifications in series or parallel without checking the combined voltage and current.
- Forcing connectors. A connector that does not seat easily is misaligned or the wrong type. Forcing it can crack housings and cause shorts.
- Using damaged cable. Inspect insulation and connector housings for cracks, discoloration or melted spots before each use.
- Skipping polarity checks. Reversed polarity is an easy error with unlabeled adapters.
Tips for Reliable Solar Charging
- Keep a short, labeled extension cable on hand so you can position the panel without stretching the adapter.
- Check connectors every few months for corrosion, especially if the setup stays outdoors.
- Store the panel and adapter together in a case so the connections stay clean and dry.
- Note the station’s solar input at different times of day to learn your site’s real output.
Recommended gear
A few supporting items can make adapter setups easier and safer. Look for models that match your specific station and panel.
- Jackery DC Extension Cable helps position panels away from the station without stressing the connection. View on Amazon
- Jackery Solar Panel Connector provides a purpose-built link between compatible Jackery components. View on Amazon
- A digital multimeter lets you verify open-circuit voltage before connecting anything, which is the most useful safety check in this process. View on Amazon
- A portable solar panel carrying case protects connectors and cables during transport and storage. View on Amazon
FAQ
Can any solar panel work with a Jackery solar panel adapter?
Not necessarily. An adapter only changes the physical connector. The panel’s open-circuit voltage, operating voltage and current must fall within the station’s specified solar input limits. Check both before connecting.
Will an adapter reduce charging speed?
Adapters add a small amount of resistance, which can cause minor losses. Use short, appropriately gauged cables and well-seated connectors to keep losses small.
How do I know if the adapter is wired with correct polarity?
Check the markings on both connectors and confirm positive connects to positive and negative to negative. A multimeter can verify polarity at the panel output before you connect the station.
Can I connect two panels through one adapter?
Only if the station and adapter support multiple inputs or you use a properly rated combiner. Confirm total voltage and current with the manual. Combining panels incorrectly can overload the input.
Why does my station show low solar input?
Common causes include partial shading, low sun angle, dirty panels, high temperatures and cloud cover. Clean the panel, adjust its angle and check connections for loose fittings.
Is it safe to use an adapter outdoors in rain?
Use only adapters rated for outdoor use and keep connections elevated and sheltered. Avoid making or breaking connections during rain or heavy moisture. If you are unsure about electrical safety, consult a qualified electrician.
Should I hire a professional to install a solar setup?
For portable, plug-in setups, most people can follow the manufacturer’s steps. For permanent installation tied to a home’s wiring, consult a licensed electrician or solar installer.
Conclusion
A jackery solar panel adapter solves a connector problem, but it does not replace the need to check voltage, current and wattage limits. Verify the panel’s specifications against the station manual, measure open-circuit voltage, and connect in the correct order. With those steps, you can charge your station reliably and avoid the most common mistakes.
Related reading
- Jackery Solarsaga 500x Solar Panel: A Practical Guide (2026)
- Jackery SolarSaga 200 Solar Panel: Specs, Charging Output and Setup Tips
- Jackery Solar Panel Connector: How to Wire and Connect Panels Safely
- Jackery E1500v2 and 100w Solar Panel: A Practical Guide (2026)
Ready to choose one?
About Graham Fisher
Graham Fisher is part of our editorial team and reviews and edits our solar generators for home backup & emergencies guides, checking product details against manufacturer specifications and owner feedback.