 By Emily Parker
Updated November 2026
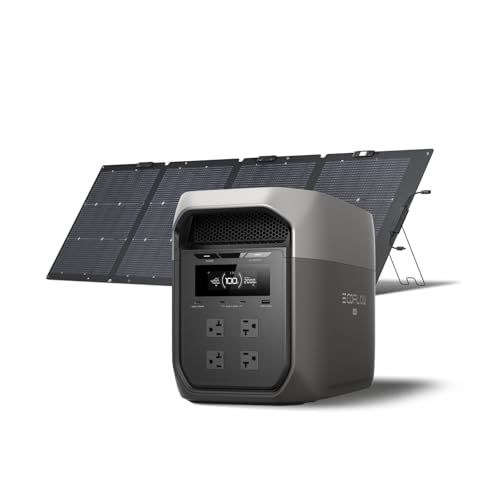
An ecoflow plug in solar setup lets you add solar panels to an EcoFlow power station and recharge it without a full rooftop installation. In this guide you will learn what the plug-in system includes, how to connect it safely, how to estimate how much backup power you can expect, and where people usually go wrong. The goal is a setup that keeps a refrigerator, a CPAP machine, or a sump pump running when the grid goes down.
What “Plug-In Solar” Means for EcoFlow Users
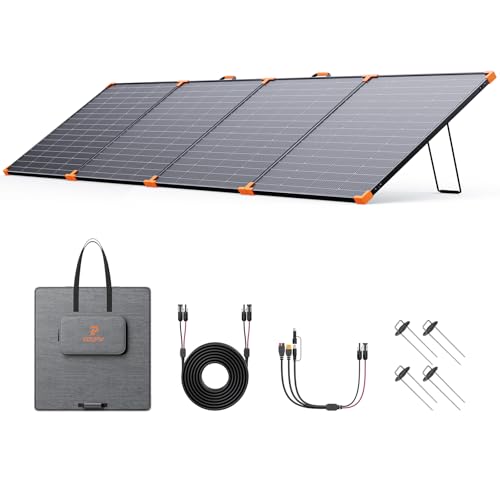
Plug-in solar, sometimes called balcony or plug-and-play solar, refers to small solar arrays that connect to a portable power station through a standard cable instead of a dedicated electrician-installed inverter. The panels feed DC power into the battery, and the power station handles the conversion and storage. Manufacturers generally describe these kits as suitable for renters, apartment dwellers, and homeowners who want modest, expandable backup rather than whole-home independence.
Shopping for one? See our guide: 8 Best Ecoflow NextGen 220W Bifacial Portable Solar Panels Compared.
Not every EcoFlow product is designed for this approach. Some models accept solar input through a dedicated port, while others expect a combined solar and charging input. Before buying panels, check the maximum solar input wattage your specific power station lists in its manual. Feeding more wattage than the rated limit can trigger protection shutdowns and is not something to attempt.
Step 1: Calculate Your Daily Energy Needs in Watt-Hours
Every sizing decision starts with watt-hours (Wh), the unit that describes how much energy a device uses over time. A device’s wattage multiplied by hours of use gives its watt-hour consumption. Use the nameplate or label on each appliance, or a plug-in watt meter for more accuracy.
Typical outage loads look like this, though your numbers will vary by model and usage:
| Device | Typical Running Power | Example Daily Use | Approximate Daily Wh |
|---|---|---|---|
| Refrigerator (compact, modern) | 50–100 W average (compressor cycles) | About 10 hours effective run time | 500–1,000 Wh |
| CPAP machine | 30–60 W | 8 hours overnight | 240–480 Wh |
| Sump pump (1/3 HP) | 500–800 W while running | About 20 minutes of total run time per day | 170–270 Wh |
| LED lighting (6 bulbs) | 36–60 W total | 5 hours | 180–300 Wh |
| Wi-Fi router and modem | 10–20 W | 24 hours | 240–480 Wh |
Add your loads together, then add a 20 percent buffer for inverter losses and battery aging. A refrigerator, CPAP, lights, and a router together might need roughly 1,200 to 2,000 Wh per day. Sump pumps and refrigerators have high startup surges, so check that the power station’s continuous and surge ratings exceed the device’s starting wattage.
Step 2: Match Panel Wattage to Your Recharge Goal
Solar panel output depends on sunlight, angle, shading, and temperature, so a panel’s rated wattage is the best-case number. As a rough planning rule, many users assume a panel will deliver about 4 to 5 hours of useful peak output on a clear day, which is a simplification but useful for estimates. A 400 W panel might therefore produce on the order of 1,600 to 2,000 Wh on an excellent day and much less in winter or under partial cloud.
To estimate recharge time, divide the battery’s missing watt-hours by the realistic daily solar yield. If your station is 2,000 Wh and you are starting at 20 percent, you need about 1,600 Wh of input. Two 400 W panels in good sun may cover that in a day, while a single 100 W panel could take several days.
Step 3: Connect the System Safely
Connecting plug-in solar is designed to be straightforward, but a few steps matter every time:
- Power off your EcoFlow unit and confirm all loads are disconnected before you start wiring.
- Inspect the panel connectors and cables for cracks, bent pins, or exposed copper. Replace anything damaged.
- Connect the panel leads to the solar input using the correct adapter for your model. Do not force connectors that do not seat easily.
- Position the panels to face the sun as directly as possible, typically south-facing in the Northern Hemisphere, and tilt them near your latitude for better yield.
- Power on the unit and confirm the app or display shows solar input before walking away.
- Route cables so they cannot be tripped over, pinched by a door or window, or exposed to standing water.
Keep panels away from roof edges, avoid mounting above people or pets, and secure them against wind. If you are unsure about wiring, mounting on a roof, or whether your electrical service is compatible, consult a qualified electrician or a licensed solar installer.
Step 4: Plan for Real-World Conditions
Several factors reduce output below the rated number. Shading from a tree or chimney can cut production sharply, even when only a small part of a panel is covered. Heat lowers panel efficiency, and dust or snow reduces intake. Clouds matter too, so plan for two or three low-sun days if you rely on solar during a multi-day outage.
Many owners pair solar with a backup charging source. A standard wall outlet or, where supported, a vehicle charger can top up the battery when clouds linger. Check your specific model’s documentation for supported charging options before depending on them.
Step 5: Set Priorities for What Stays On
Even a well-sized system has a finite energy budget. Decide in advance which loads matter most. A CPAP and a refrigerator usually come first, followed by a router for communication, then lighting. Discretionary items like space heaters, microwaves, and electric kettles draw large amounts of power and can drain a battery in an hour or two.
- Use the power station’s app or display to monitor state of charge and input watts.
- Keep the refrigerator closed as much as possible to reduce compressor cycling.
- Run the sump pump only when needed, and confirm its startup surge is within your unit’s ratings.
Common Mistakes
- Ignoring the maximum solar input. Pairing too many panels with a station that has a lower input limit wastes capacity and may stress the unit.
- Sizing for sunny-day output only. Plan for overcast days, winter angles, and partial shade.
- Forgetting startup surge. Motors and compressors can spike far above their running wattage.
- Leaving cables exposed. UV, moisture, and foot traffic degrade connectors over time.
- Assuming all EcoFlow models use the same solar input. Input ports, voltages, and maximum wattage vary by model.
Recommended gear
A few accessories make plug-in setups easier to manage. Choose items compatible with your specific EcoFlow model and panel connectors.
- EcoFlow MC4 to XT60 solar cable helps bridge common panel connectors to EcoFlow-style inputs, which many users find necessary when mixing panel brands. View on Amazon
- EcoFlow solar extension cable lets you place panels farther from the station without straining the connection. View on Amazon
- Adjustable panel mounting bracket allows tilt adjustment for seasonal sun angles, improving yield in winter. View on Amazon
- Plug-in watt meter measures actual consumption of your appliances so your Wh estimates are based on real numbers. View on Amazon
Tips for Better Results
- Test the full system in daylight before a storm season so you learn how it behaves.
- Clean panel surfaces periodically, especially after dust or pollen events.
- Keep a written list of your critical loads and their watt-hour estimates next to the station.
- Store the station in a dry, ventilated spot within its recommended temperature range.
For broader context on configurations, you may find Ecoflow Stream Plug & Play Solar System: Setup Guide for Home Backup (2026) useful, and Top 5 EcoFlow Power Stations with Solar Panel Options for Home Backup (2026) can help you compare pairings. If you are choosing cables, EcoFlow Solar Panel Cables: How to Choose and Connect the Right Ones covers the connection types in more detail. Panel input limits are covered in Ecoflow Delta Pro Ultra Solar Input Specs: A Practical Guide (2026), and EcoFlow Solar Panel Connector: How to Wire Panels Safely (2026) walks through safe wiring.
FAQ
Can I use any solar panel with an EcoFlow power station?
Not always. Panels must match your station’s voltage and maximum input wattage, and connectors may require an adapter. Check the manual for your specific model before buying.
How many panels do I need for a refrigerator?
It depends on your refrigerator’s daily consumption and local sun. Many households use two or more panels to recharge a battery that supports a refrigerator overnight and during the day, but actual needs vary widely.
Will plug-in solar run a sump pump?
It can, if the power station’s surge rating covers the pump’s startup load and the battery holds enough energy for its runtime. Confirm both numbers before relying on it.
Can I charge the station on a cloudy day?
Solar output drops substantially under cloud cover, but some charging usually still occurs. Plan for slower recharge and consider a backup charging method if your model supports one.
Is plug-in solar safe to install myself?
Many owners connect panels without professional help, but roof mounting, electrical service changes, and unusual wiring should involve a licensed electrician or solar installer.
How long will the battery last during an outage?
Runtime equals battery watt-hours divided by your load in watts, minus inverter losses. Calculate with your actual device list rather than the battery label alone.
Does cold weather affect performance?
Yes. Batteries can charge more slowly and deliver less capacity in low temperatures, and short winter days reduce solar yield. Keep the station within its recommended operating range.
Conclusion
An ecoflow plug in solar system can keep essential loads running through outages when it is sized to your real watt-hour needs. Start by totaling your appliance consumption, match panel output to a realistic recharge goal, and connect everything according to your model’s specifications. Check input limits, plan for cloudy days, and consult a professional for anything beyond simple plug-in wiring.
Related reading
Ready to choose one?
About Emily Parker
Emily Parker is part of our editorial team and reviews and edits our solar generators for home backup & emergencies guides, checking product details against manufacturer specifications and owner feedback.