 By Emily Parker
Updated November 2026
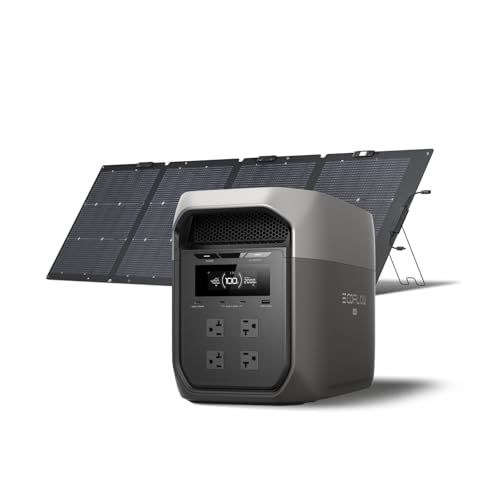
The ecoflow delta pro ultra solar input specs define how much sunlight energy the power station can accept, at what voltage, and how quickly it will recharge during an outage. In this guide you will learn how to read those specs on the datasheet, how to match a solar array to the unit’s input limits, and how to estimate realistic recharge times for a home backup setup. Specific figures should always be confirmed against the current manufacturer documentation, since input ratings can change with firmware and accessory configuration.
Why Solar Input Specs Matter for Home Backup
A power station is only as useful as its ability to refill between uses. During a multi-day outage, the battery may need to cover a refrigerator, a CPAP machine, a sump pump, and phone charging, and the recharge rate determines whether you stay ahead of consumption. The solar input specification is the ceiling on that recharge rate. If your panels can produce more than the unit can accept, the excess is wasted. If your panels produce less, you are waiting longer than necessary.
Shopping for one? See our guide: 7 Best EcoFlow Delta Pro Ultra Battery Options Compared (2026).
Many owners underestimate how much the input rating and the real-world panel output differ. A panel’s nameplate wattage is measured under ideal test conditions, while actual output drops with cloud cover, heat, shading, and the angle of the sun. The spec sheet tells you the boundaries, and your site conditions decide where you land inside them.
How to Read the EcoFlow Delta Pro Ultra Solar Input Specs
Manufacturer datasheets for EcoFlow’s high-capacity power stations typically list several solar-related values. Learn what each one means before you buy panels or connectors.
Maximum Solar Input Power
This is the highest wattage the unit will accept from solar sources at one time. It is the most important number for sizing. Ratings for this class of power station are usually expressed as a combined maximum across all solar input ports, so check whether the figure applies to one port or the total. If the datasheet lists a combined limit, plan your array around that total rather than around each port separately.
Input Voltage Range
Solar input is governed by a voltage window. Panels configured in series raise voltage, and panels in parallel raise current. If the open-circuit voltage of your string exceeds the maximum listed, the input circuitry may shut down or be damaged. If the operating voltage falls below the minimum, the charge controller may not start. Always calculate string voltage at the coldest expected temperature, because open-circuit voltage rises as temperature drops.
Maximum Input Current
Current limits matter when you wire panels in parallel or use a single high-output panel. Compare the short-circuit current of your panels to the listed maximum input current. Using a panel with higher current than the input can handle will not usually cause harm if the unit’s controller regulates it, but it is wasteful and may trigger protective limits.
Connector Type and Port Count
The datasheet will identify the connector style, commonly MC4-compatible or a manufacturer-specific port. Confirm the connector type before ordering adapters or extension cables, and verify how many solar ports the unit provides. Port count determines how you can split an array into separate strings.
Step-by-Step: Sizing a Solar Array to Your Input Limit
Use the following steps to match panels to the unit. Work from the datasheet numbers, then adjust for local conditions.
- Record the maximum solar input power from the current manufacturer spec sheet.
- Record the input voltage range, including the maximum open-circuit voltage.
- Gather the panel specs you are considering: rated wattage, open-circuit voltage (Voc), short-circuit current (Isc), and maximum power voltage (Vmp).
- Choose a wiring configuration. Series wiring raises voltage; parallel wiring raises current. Keep the total string voltage under the unit’s maximum at cold temperatures.
- Calculate total array wattage and compare it to the maximum solar input power. A modest oversize is common practice, but do not expect the unit to accept power beyond its rated input.
- Estimate daily harvest using peak sun hours for your location, derated for losses.
- Calculate recharge time from usable battery capacity divided by realistic average input power.
Estimating Daily Harvest
Peak sun hours are the equivalent number of hours per day when sunlight averages 1,000 watts per square meter. Many US locations fall somewhere between about three and six peak sun hours on average, varying by season and region. A practical formula is:
Daily energy (Wh) = Array wattage × Peak sun hours × 0.75
The 0.75 factor is a rough allowance for heat, wiring, and conversion losses. Treat it as a planning estimate, not a guarantee.
Sample Sizing Table
The table below shows how different array sizes translate into daily energy under a sample of sun conditions, using the 0.75 derating factor. Substitute your own array size and peak sun hours.
| Array Wattage | Peak Sun Hours | Estimated Daily Energy (Wh) |
|---|---|---|
| 400 W | 4 | 1,200 Wh |
| 800 W | 4 | 2,400 Wh |
| 1,200 W | 4 | 3,600 Wh |
| 800 W | 6 | 3,600 Wh |
Calculating Recharge Time
Recharge time depends on how much energy you need to restore and how much power the array delivers at the average point of the day. Suppose you have a battery that you have drawn down by 2,000 Wh and you expect an average solar input of 500 W across useful daylight. The rough estimate is 2,000 Wh divided by 500 W, or about four hours of effective charging. In practice, input power tapers in the morning and afternoon, and it may take most of a full sunny day to reach a full charge, so use the average power rather than the peak.
If the battery is also supplying loads during the day, net recharge is slower. A refrigerator running continuously can consume a significant share of harvested energy, so model the daytime load alongside the solar input.
Checklist Before You Connect Panels
- Confirm the maximum solar input power and whether it is per port or combined.
- Calculate maximum string voltage at the lowest expected ambient temperature.
- Verify connector type and use only compatible adapters.
- Check panel Isc against the unit’s maximum input current.
- Mount panels with clear exposure and an orientation suited to your latitude.
- Keep the manufacturer manual and firmware notes available for reference.
For a deeper look at panel selection and wiring, see Solar Panels for EcoFlow Delta Pro: How to Choose and Connect Them (2026). If you are comparing solar extension hardware, Top 4 EcoFlow Solar Extension Cables Compared for Home Backup covers several options. For a broader framework to evaluate any power station’s inputs, How to Compare Solar Generators: A Spec-Sheet Checklist is a useful reference.
Common Mistakes
- Ignoring cold-weather voltage. Open-circuit voltage rises in winter, and a string that is safe in summer can exceed the limit in January.
- Treating nameplate wattage as real output. Shading, dust, and heat reduce actual production well below rated values.
- Oversizing without checking limits. Extra panels beyond the input ceiling will not charge the unit faster.
- Mixing panel types in one string. Different voltage and current characteristics can reduce output and complicate troubleshooting.
- Using unrated adapters. Improvised connectors can overheat or fail under load.
Tips for Better Solar Charging
- Clean panels regularly and check for debris after storms.
- Tilt panels toward the sun for your season if your mounting allows adjustment.
- Track daily solar yield on the unit’s app, if available, to compare against your estimates.
- Plan critical loads around peak sun hours when possible.
Recommended gear
Choosing the right accessories depends on how you mount and wire your array. Owners commonly find the following categories useful, and the search phrases below will help you locate compatible options.
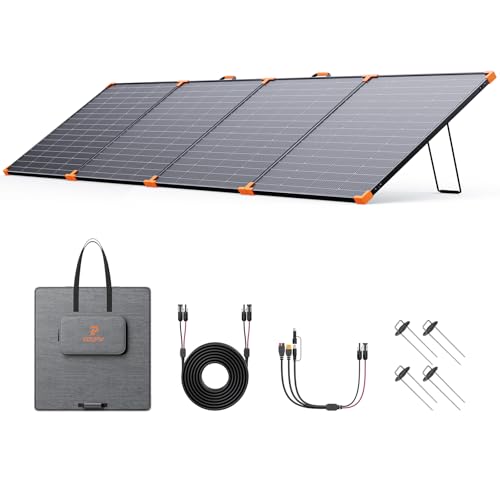
- EcoFlow 220W Bifacial Solar Panel – A panel sized for modular expansion, useful for building a string that stays within the input window. View on Amazon
- MC4 solar extension cable – Lets you position panels farther from the unit while keeping connections weatherproof. View on Amazon
- Digital multimeter with DC voltage function – Lets you measure open-circuit voltage before connecting, which helps confirm cold-weather limits. View on Amazon
FAQ
What is the maximum solar input for the EcoFlow Delta Pro Ultra?
Check the current manufacturer datasheet for the exact maximum solar input power, since the figure is stated in the product documentation and can differ by model variant. Plan your array around that rated limit.
Can I connect more panels than the rated input?
You can, but the unit will not accept power beyond its rated input. Extra panels add cost and complexity without faster charging, and they may trigger protective limits if voltage or current exceeds the spec.
Why does open-circuit voltage matter?
Open-circuit voltage is the highest voltage a panel string produces, and it rises in cold weather. If that value exceeds the unit’s maximum input voltage, the input circuitry can be damaged. Calculate it at the coldest expected temperature.
Do I need MC4 connectors?
Many panels use MC4-style connectors, but confirm the connector type on the datasheet for both the unit and your panels. Use adapters only if they are rated for your current and voltage.
How long does solar recharge take?
Divide the energy you need to restore by the average solar input power you expect during daylight. Remember that input tapers at the start and end of the day, and daytime loads reduce net charging.
Does weather affect solar input?
Yes. Clouds, haze, rain, snow, and high temperatures all reduce real output. Use derated estimates for planning, especially in regions with frequent overcast days.
Should I consult a professional for installation?
For permanent rooftop or high-voltage installations, consult a licensed electrician or solar installer, and confirm local permitting requirements. Portable setups still benefit from a professional check if you are unsure about wiring safety.
Conclusion
The solar input specs for this power station set the boundaries for how quickly and safely you can recharge it. Read the maximum input power, voltage window, and current limit from the current datasheet, then size your array with realistic sun-hour estimates. Verify cold-weather voltage and connector compatibility before wiring, and confirm all figures against the manufacturer’s documentation.
Ready to choose one?
About Emily Parker
Emily Parker is part of our editorial team and reviews and edits our solar generators for home backup & emergencies guides, checking product details against manufacturer specifications and owner feedback.