 By Emily Parker
Updated November 2026
Ecoflow solar panel cables are the link between your panels and your power station, and picking the wrong one is the most common reason a setup charges slowly or not at all. In this guide you will learn how to identify your connector type, match it to the right cable, size the wire for your run length, and connect everything in the correct order. You will also see the mistakes that cause trouble during outages, when you need the system to work the first time.
Why the Right Solar Panel Cable Matters
A solar panel cable does three jobs. It carries current from the panel to the power station, it has to match the connector on each end, and it has to be thick enough that voltage does not drop too far over distance. Get any one of these wrong and you lose charging power, or in the worst case you create a heat or fire hazard at a loose connection. A cable that looks like it fits is not the same as a cable that is rated for your panel’s current.
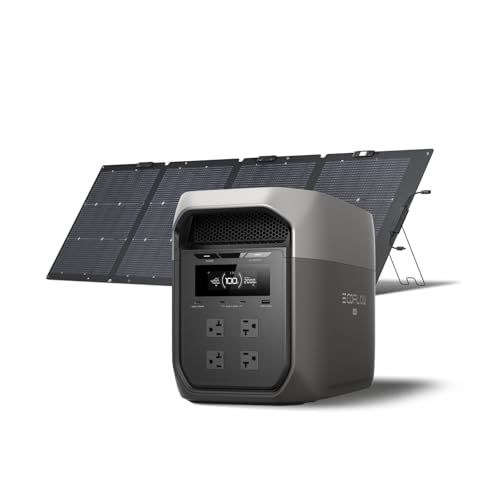
Shopping for one? See our guide: 8 Best Ecoflow NextGen 220W Bifacial Portable Solar Panels Compared.
Most EcoFlow setups use a few common connector families, and the cable you need depends on which end is which. Read the connector labels on your panel and on the power station input before you buy anything.
Step 1: Identify Your Connectors
Start by checking the connector on the back of each panel and the input port on your power station. Two families show up most often with EcoFlow equipment:
- MC4 connectors: Standard solar connectors used on many rigid and flexible panels. They are typically paired with a female and male end that lock together.
- XT60 connectors: A round, keyed plug common on power station DC inputs and on many portable panels. XT60 is rated for higher current than many small connectors.
Many setups need an adapter or a transition cable, such as an MC4 to XT60 cable, to connect a panel with one connector type to a station with another. Check the exact pin layout and polarity on both ends before connecting, because reversed polarity can damage the input.
Confirm Polarity and Voltage
Look for the positive and negative markings on each connector. Standard practice is red for positive and black for negative, but always confirm against the labels, not just the colors. Also confirm the panel’s rated open-circuit voltage (Voc) and the maximum input voltage the power station accepts. If the combined voltage of panels wired in series exceeds the station’s input limit, the controller can be damaged. Manufacturers list these limits in the product manual.
Step 2: Choose the Cable Type and Length
Once you know your connectors, pick a cable that matches them at both ends. Next, decide the run length, meaning the distance from the panels to the power station. Longer runs lose more voltage, and that loss reduces charging efficiency. Keep runs as short as your layout allows.
Match Wire Gauge to Run Length
Solar cables are measured by American Wire Gauge (AWG). A lower gauge number means thicker wire. The table below is a general guide for short runs. Always confirm with the cable maker’s ampacity and voltage-drop chart, and use a thicker wire if your run is long or the panel current is high.
| Approximate One-Way Run | Typical Wire Gauge Direction | Notes |
|---|---|---|
| Under 10 feet | 12 AWG to 10 AWG | Usually enough for a single portable panel |
| 10 to 25 feet | 10 AWG | Watch voltage drop on higher-wattage panels |
| 25 to 50 feet | 8 AWG or heavier | Consider a thicker wire or reduce run length |
| Over 50 feet | Consult a qualified installer | Long runs at higher voltage need careful engineering |
For runs that are long, buried, or mounted permanently on a roof, consult a licensed electrician or solar installer. Wiring that runs through walls or attics has code requirements that go beyond a plug-in portable setup.
Step 3: Gather Tools and Supplies
Having the right tools on hand keeps connections clean and secure. You will typically need:
- A multimeter to check open-circuit voltage and polarity
- A wire stripper and crimper if you are making custom cables
- Outdoor-rated cable clips or zip ties to secure runs
- UV-resistant tape or cable sleeves for exposed sections
- A flashlight or headlamp for checking connections in low light
Step 4: Connect the System in the Right Order
Connection order matters. The goal is to avoid making or breaking a live connection under load, and to confirm each link before you move on.
- Make sure the power station is switched off and no load is connected.
- Lay out the panels and check that each connector is seated and dry.
- Measure the open-circuit voltage at the end of the panel cable with a multimeter, and confirm polarity.
- Connect the cable to the power station input, starting with the negative side if your cable design calls for that order.
- Turn the power station on and confirm it shows solar input.
- Check the input reading in the EcoFlow app or on the station screen.
When disconnecting, reverse the order and disconnect the panels first while the station is off or in a low-input state.
Common Mistakes
- Using an extension cable with the wrong gauge. A thin extension wire on a long run wastes power and can overheat.
- Mixing connector brands. Some connectors look similar but are not interchangeable. Use adapters that are made for the pairing you need.
- Ignoring voltage limits. Wiring too many panels in series can exceed the station’s maximum input.
- Leaving connections exposed to water. Drip loops and sealed connectors help keep moisture out.
- Skipping the multimeter check. A quick voltage and polarity check catches most wiring errors before they cause damage.
Tips for Reliable Charging
- Keep cable runs short and route them away from foot traffic.
- Label both ends of each cable so you can reconnect quickly during an outage.
- Inspect connectors every few months for corrosion, cracks, or heat marks.
- Store spare cables in a dry, cool location away from direct sun.
- Read the manufacturer manual for your specific panel and power station model, since limits vary by product.
For more background on matching panels to your station, see Solar Panel Compatibility With Power Stations: Voltage, Connectors and MPPT Limits and EcoFlow Solar Panel Connector: How to Wire Panels Safely (2026). If you are working with an MC4 to XT60 adapter specifically, EcoFlow MC4 to XT60 Solar Cable: Step-by-Step Wiring Guide walks through that wiring in detail. To estimate how many panels you need before you buy cable, the Solar Panel Size Calculator for Portable Power Stations is a useful starting point.
Recommended gear
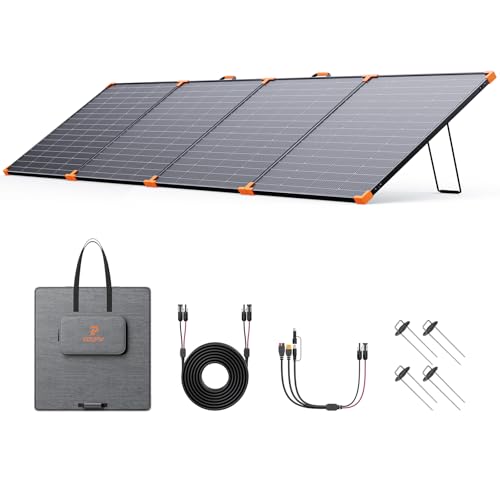
- EcoFlow MC4 to XT60 cable: Makes the direct link between an MC4-equipped panel and an XT60 power station input, which removes the need for multiple adapters. View on Amazon
- Jackery DC Extension Cable: Helps when your panels sit farther from the station than the stock cable reaches, so you can keep the run short and secure. View on Amazon
- Digital multimeter: Lets you confirm open-circuit voltage and polarity before connecting anything to the station. View on Amazon
- UV-resistant cable clips: Keep outdoor runs off the ground and away from sharp edges, which reduces wear over time. View on Amazon
FAQ
Can I use any MC4 cable with my EcoFlow power station?
Not always. An MC4 cable only works with the station if the other end matches the station’s input connector, which is often XT60 on EcoFlow units. Use a cable or adapter specifically made for that pairing.
What wire gauge should I use for solar panel cables?
For short runs under about 10 feet, 10 to 12 AWG is common. Longer runs need thicker wire to limit voltage drop. Check the cable manufacturer’s chart for your current and distance.
Does cable length affect charging speed?
Yes. Longer or thinner cables cause more voltage drop, which reduces the power that reaches the station. Shorter runs with adequate gauge generally charge more efficiently.
Can I extend a solar panel cable?
You can, using a matched DC extension cable rated for solar use. Keep the extension short and make sure connectors are the same family and the wire gauge is adequate.
How do I know if my panel and cable are compatible?
Compare the panel’s open-circuit voltage and rated current to the station’s input limits, and confirm the connector types match. The product manuals list these specifications.
Why does my power station show no solar input?
Common causes include reversed polarity, a loose connector, a connector mismatch, or voltage outside the input range. Recheck each connection with a multimeter, and consult the manufacturer if the problem continues.
Should I hire an electrician for solar cable work?
For portable setups with plug-in connections, you can usually do the work yourself by following the manual. For permanent or roof-mounted installations, consult a licensed electrician or solar installer, since code requirements apply.
Conclusion
Good ecoflow solar panel cables come down to three checks: the connectors match at both ends, the wire is thick enough for the run, and the voltage stays within the station’s limits. Confirm polarity with a multimeter, keep runs short, and label your cables so setup is fast when you need it most. When in doubt, follow the manufacturer’s manual or ask a qualified installer.
Ready to choose one?
About Emily Parker
Emily Parker is part of our editorial team and reviews and edits our solar generators for home backup & emergencies guides, checking product details against manufacturer specifications and owner feedback.