 By Graham Fisher
A Jackery E1500 V2 paired with a 100W solar panel can add a steady trickle of power to a home backup kit during an outage, though it won’t fully recharge the station on a single panel in one day. This guide explains what that pairing realistically delivers, how to estimate charge times from the numbers, how to connect everything safely, and where the limits are. Exact output depends on sunlight, weather, panel angle and the station’s input rating, so treat the figures below as planning estimates rather than guarantees.
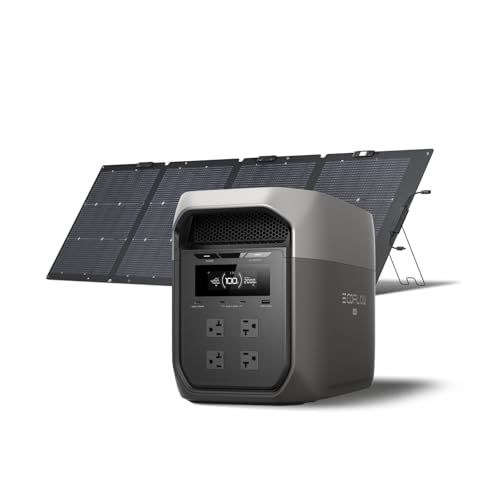
What the Jackery E1500 V2 and a 100W Panel Can Do Together
The E1500 V2 is a portable power station with roughly 1,500 watt-hours of usable capacity according to Jackery’s published specifications. A 100W solar panel produces up to 100 watts under ideal conditions, which is the peak rating under standard test light, not what you’ll see at noon on a hazy day. In practice, a single 100W panel usually delivers somewhere in the range of 300 to 500 watt-hours on a good sunny day, depending on season and location, which means one panel can recharge roughly a quarter to a third of the station per day.
Shopping for one? See our guide: 7 Best Ecoflow 100W Flexible Solar Panels for Portable Power Stations (2026).
That makes the setup well suited to slowly extending runtime during a multi-day outage, keeping phones, a laptop, LED lights and a small fridge running in rotation. It is not well suited to running a space heater or central air.
Key numbers to know
| Item | Typical value (check your model’s manual) | Why it matters |
|---|---|---|
| Usable battery capacity | About 1,500 Wh (E1500 V2) | Sets total energy you can store |
| Panel rated power | 100 W | Peak input under test conditions |
| Realistic daily yield, one panel | About 300–500 Wh on a good sunny day | Sets how fast the station recharges |
| Time to add 1,000 Wh from one panel | Roughly 2–3 sunny days | Planning baseline for outages |
Step 1: Check Compatibility Before You Buy or Connect
Not every solar panel plays well with every station. Before connecting anything, confirm the panel’s open-circuit voltage and maximum input current fall within the station’s solar input range. Jackery lists these limits in the E1500 V2 manual, and you should compare them against the panel’s specification sheet. Connector type also matters: the station and panel must use compatible plugs, or you’ll need a verified adapter.
If you’re unsure whether a panel will work, our guide on Solar Panel Compatibility With Power Stations: Voltage, Connectors and MPPT Limits walks through the specific checks, and Portable Solar Panels for Solar Generators: What to Look For covers features to prioritize.
Step 2: Estimate Your Charge Time
To estimate charge time, start with the energy you need to replace, then divide by the realistic daily yield. Here is a simple method:
- Note the station’s battery capacity in watt-hours (about 1,500 Wh for the E1500 V2).
- Estimate how much is already used. If the battery is at 40 percent, you need about 900 Wh to fill it.
- Divide by a conservative daily yield. Using 350 Wh per sunny day, 900 Wh takes about 2.5 days.
- Add margin for clouds, shade and the charging efficiency loss between panel and battery, which commonly runs 10 to 20 percent.
Charging losses are real: the conversion path from panel to battery is never 100 percent efficient. For a deeper method, see How Long Does It Take to Charge a Solar Generator With Solar Panels?.
Step 3: Position the Panel for Maximum Output
Panel placement often matters more than people expect. A few practical adjustments make a noticeable difference:
- Face the panel toward the sun. In the Northern Hemisphere, that generally means south.
- Tilt the panel so it is roughly perpendicular to the sun’s rays. A tilt near your latitude is a common starting point, then adjust seasonally if you can.
- Avoid shade from trees, railings, gutters or neighboring structures, even partial shade on one cell can cut output sharply.
- Keep the panel clean. Dust, pollen and bird droppings reduce yield.
Step 4: Connect the Panel Safely
Tools and supplies you may need
- The E1500 V2 power station, fully discharged or partially charged
- The 100W solar panel with a compatible output cable
- A sturdy stand or mounting bracket to hold the panel at the correct angle
- Cable ties and a cable protector if running cable outdoors
- A multimeter for checking open-circuit voltage before connecting (optional but useful)
Connection sequence
- Set the station on a flat, dry surface in a shaded, ventilated spot. Never place it in an enclosed space.
- Place the panel in full sun and confirm it is not shaded.
- Run the cable from panel to station. Route it so no one can trip over it and so it is not pinched.
- Connect the panel to the station’s solar input. Check the station display to confirm charging has started.
- Watch the input wattage over the first 10 to 15 minutes and adjust the panel angle if the reading is unexpectedly low.
Consult the manufacturer’s manual for the exact input port, polarity and any firmware-related steps, as these vary by model revision.
Step 5: Plan Loads Around Your Charge Rate
Once the station is charging, decide what it will power. A 100W panel supplies roughly 100 watts at best, so running a device that draws more than that will drain the battery faster than the panel refills it during the day. For example, a 60W laptop charging for three hours uses about 180 Wh, which a single panel can recover on a good day, but a 1,000W microwave will drain the station in well under two hours.
For sizing guidance across different loads, see What Can a 300W Solar Generator Run? (With Runtime Math) and What Can a 500W Solar Generator Run? (With Runtime Math). For a sense of the bigger picture, Solar Panel Size Calculator for Portable Power Stations helps you match panel wattage to your battery.
Common Mistakes to Avoid
- Assuming rated wattage equals actual output. Plan on about half of 100W averaged across a sunny day, and less in cloudy weather.
- Ignoring shade. A small shadow across one section can disproportionately reduce output.
- Mounting the panel flat. A flat panel loses significant yield compared with a tilted one, especially in winter.
- Running heavy loads while charging with one panel. You’ll slowly deplete the battery instead of building reserve.
- Connecting an incompatible panel. Check voltage and current limits before plugging in.
- Using the station in a closed space. Batteries generate heat, so keep airflow clear.
Tips for Better Results During an Outage
- Charge the station fully from grid power before a storm if you can, then use solar to extend runtime.
- Prioritize low-draw loads such as LED lighting, phones and a laptop.
- Track input and output wattage on the station display so you know your real daily yield.
- Check the weather forecast and plan for at least two or three cloudy days in a row.
- If you need more solar capacity, consider adding a second panel, but check that the station and combined wiring stay within limits. Our guide on Connecting Solar Panels in Series vs Parallel for a Power Station explains the wiring trade-offs.
Recommended gear
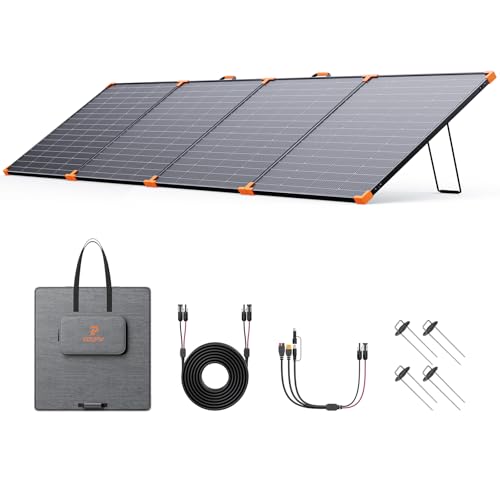
- Jackery SolarSaga 100W: Jackery’s own 100W panel is designed to pair with its power stations, so the connector and voltage match are straightforward. View on Amazon
- Adjustable solar panel stand: A stand that lets you change tilt angle makes it easier to chase the sun through the day and across seasons. View on Amazon
- Multimeter: A basic digital multimeter lets you check open-circuit voltage before connecting, a quick safety step. View on Amazon
FAQ
How long does a 100W panel take to fully charge the E1500 V2?
From an empty battery, a single 100W panel typically needs several sunny days, often two to four, depending on weather and panel placement. Actual time varies, so measure your own daily yield to refine the estimate.
Can one 100W panel run a refrigerator?
It can help, but a refrigerator’s average draw depends on the model and temperature. A single panel usually cannot replace all of its energy in a day. Running it intermittently alongside the station’s battery is more realistic.
Will it charge on cloudy days?
Yes, but output drops substantially. Overcast skies can reduce yield to a small fraction of the sunny-day figure.
Can I connect two 100W panels to the E1500 V2?
Possibly, but you must confirm the station’s maximum solar input limits first. Exceeding them can damage equipment. Check the manual and wiring guidance before combining panels.
Does the panel need to be pointed directly at the sun?
Pointing it roughly toward the sun and tilting it to face the sun’s path gives the best results. Even a modest misalignment can noticeably reduce output.
Can I leave the setup outdoors in the rain?
Panels are generally weather-resistant, but the power station should be kept dry and ventilated. Check both products’ ratings for water and temperature limits.
Should I consult a professional for backup power?
For connecting a backup system to home wiring, such as a transfer switch, consult a licensed electrician. Portable setups like this one generally do not require that, but electrical safety rules still apply. You may also like 5 Best Jackeries With Solar Panel Options for Home Backup (2026).
Conclusion
The Jackery E1500 V2 with a 100W solar panel is a practical way to extend backup power, provided you plan around realistic daily yields rather than peak ratings. Confirm compatibility, position the panel carefully, and estimate charge time from your actual energy needs. Keep heavy loads in check and expect slower recovery on cloudy days, and the setup can keep essential devices running through a long outage.
Ready to choose one?
About Graham Fisher
Graham Fisher is part of our editorial team and reviews and edits our solar generators for home backup & emergencies guides, checking product details against manufacturer specifications and owner feedback.