 By Graham Fisher
A jackery solar panel connector is the plug that links your solar panel’s output cable to your Jackery power station’s solar input. Getting it right means matching the connector type, keeping polarity correct, and staying within the input limits your power station specifies. This guide walks through identifying the connector, checking compatibility, making a secure connection, and avoiding the mistakes that cause slow charging or damaged gear.
What a Jackery Solar Panel Connector Does
The connector carries direct current (DC) from the solar panel into the power station’s charge controller. Most portable panels sold for Jackery use MC4-style or proprietary plugs with a locking collar. The connector also carries the polarity: one side is positive, the other negative, and reversing them can trip protection circuits or, in worst cases, damage components. Because solar panels produce DC voltage whenever light hits them, a connector should never be plugged or unplugged under heavy load if you can avoid it.
Shopping for one? See our guide: Jackery HomePower 3600 Plus Solar Generator: 5 Best Picks Compared (2026).
Step 1: Identify Your Connector Type
Before buying adapters or extension cables, look at the plug on both the panel and the power station. Check for these details:
- Plug shape and locking style (twist-lock, snap-lock, or friction fit)
- Pin count and whether the contacts are visibly marked + and −
- Any labels on the cable or port showing voltage and current limits
- Whether the connector is the same brand as the input port
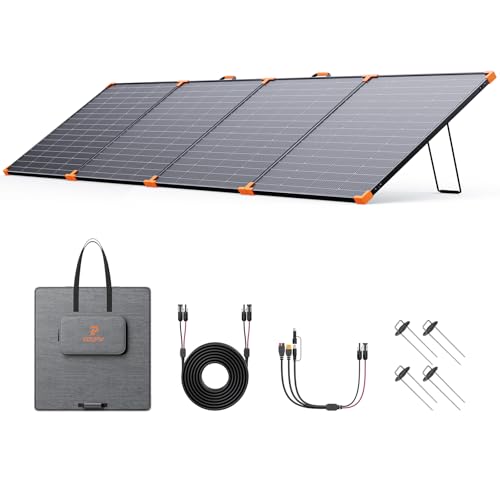
Jackery’s own panels generally use connectors designed to mate with Jackery input ports. Third-party panels may use MC4 connectors, which are a common industry standard. An MC4-to-Jackery adapter can bridge the two, but only if the voltage and current ratings match the power station’s specifications.
Step 2: Check Voltage and Current Compatibility
Connector compatibility is about more than shape. The panel’s open-circuit voltage (Voc) and maximum power point voltage (Vmp) must fall within the input window your Jackery power station accepts. Manufacturers list this window in the owner’s manual, usually as a maximum input voltage and a maximum input current or wattage. Exceeding the maximum voltage is the most common way to damage a charge controller.
For a deeper look at how voltage, connectors and maximum power point tracking (MPPT) limits interact, see Solar Panel Compatibility With Power Stations: Voltage, Connectors and MPPT Limits. If you are still choosing panels, Portable Solar Panels for Solar Generators: What to Look For covers the specs worth comparing.
| Check | Where to find it | What to look for |
|---|---|---|
| Connector type | Panel cable and power station input port | Matching plug, or a listed adapter |
| Maximum input voltage | Power station manual or spec sheet | Panel Voc (cold weather raises it) stays below the limit |
| Maximum input current or watts | Power station manual | Panel output does not exceed the input cap |
| Polarity | Connector markings | Positive to positive, negative to negative |
Step 3: Gather Your Tools and Supplies
Most connections need no tools, but a few items make the job safer and more reliable:
- A multimeter to confirm open-circuit voltage and polarity
- Dust caps or covers for unused ports
- Cable ties or clips to keep runs off walkways
- The correct adapter or extension cable, if you are bridging connector types
- A shaded or covered area for the connection, if possible
Step 4: Connect the Panel Safely
Follow this sequence to reduce the risk of arcing and polarity errors:
- Switch the power station’s solar input off, or make sure nothing is actively drawing solar power.
- Cover the solar panel’s face with an opaque sheet or position it out of direct sun while you connect.
- Check polarity on both ends. Confirm the positive lead on the panel goes to the positive input.
- Align the plug squarely and push until it seats fully. Lock the collar or twist the connector until it clicks.
- Gently tug the cable to confirm it is locked. A loose plug can overheat or drop out in wind.
- Uncover the panel, then confirm the power station shows solar input on its display or app.
If you connect multiple panels, check whether they should run in series or parallel. Connecting Solar Panels in Series vs Parallel for a Power Station explains how each arrangement changes voltage and current at the input.
Step 5: Verify Charging and Monitor Performance
Once connected, watch the input reading on the power station for the first few minutes. Input wattage usually climbs as the panel warms and the sun angle improves. Low readings can come from shade, dirty panels, a partly closed cable, or a bad connection at the plug. If charging seems slow, Why Is My Solar Generator Charging Slowly? Causes and Fixes walks through the most common causes.
Common Mistakes
- Reversing polarity. Always check markings. Some adapters are labeled and some are not.
- Exceeding the voltage limit. Panel voltage rises in cold weather. Do the math using the panel’s Voc at the lowest temperature you expect.
- Using generic adapters without checking ratings. A cheap adapter may not handle the current or may have loose contacts.
- Forcing a plug. Connectors should slide in with light pressure. Forcing them can bend pins.
- Leaving connectors exposed to moisture. Keep dust caps on unused ports and inspect plugs for corrosion after rain.
- Ignoring a loose connection. Heat at the plug is a warning sign. Disconnect, inspect, and reseat.
Tips for Reliable Connections
- Label each cable’s length and connector type so you can reconnect quickly.
- Use the shortest extension run practical, since longer cables add resistance and lower charging efficiency.
- Choose cable gauge appropriate for the run. Thin wire over long distances wastes power.
- Store connectors in a dry bag when not in use.
- Re-check connections after moving the panels or after strong winds.
Recommended gear
A digital multimeter helps you confirm polarity and open-circuit voltage before you plug anything in. Look for a model with DC voltage ranges that cover at least the panel’s Voc. View on Amazon
Dust caps and weatherproof covers protect unused ports and plugs from grit and moisture. View on Amazon
An MC4 to Jackery adapter is useful if your third-party panels do not match the power station’s native input plug. Confirm the adapter’s voltage and current ratings against your manual before buying. View on Amazon
A solar extension cable with a locking connector at each end gives you placement flexibility without stressing the panel’s leads. Check the wire gauge for your run length. View on Amazon
FAQ
Can I use a non-Jackery solar panel with my Jackery power station?
Often yes, but only if the panel’s voltage and current fall within the power station’s input limits and you use a compatible connector or adapter. Check the manual before connecting. You may also like Jackery 500W Solar Panel: Setup, Output and Sizing Guide.
What happens if I reverse the polarity?
Many power stations have protection circuits that prevent damage, but reversed polarity can still blow fuses or damage the input. Always verify polarity before connecting.
Do I need to turn off the power station before connecting a panel?
It is the safer approach. Switch off the solar input or ensure the unit is idle while you make the connection.
Why does my connector feel warm?
Warmth can indicate a loose contact, a corroded pin, or an undersized cable. Disconnect, inspect, and reseat. If it stays warm, stop using it and consult the manufacturer or a qualified electrician. For another angle, check out 5 Best Jackeries With Solar Panel Options for Home Backup (2026).
Can I extend a solar panel cable?
Yes, with a properly rated extension cable. Longer runs add resistance, so use the shortest practical length and a suitable wire gauge.
How do I know if my panels should be wired in series or parallel?
Series adds voltage and suits higher-voltage inputs. Parallel adds current and keeps voltage lower. Check the power station’s input specifications and the panel labels before deciding.
Should I hire a professional to install panels?
For portable setups, a careful DIY connection is common. For permanent rooftop or hardwired installations, consult a licensed electrician or solar installer.
Conclusion
A correct jackery solar panel connector setup comes down to matching the plug, confirming polarity, and staying within the input voltage and current limits. Take a minute to check the manual and use a multimeter before the first connection. Secure, properly rated connections charge more reliably and protect both your panels and your power station.
Ready to choose one?
About Graham Fisher
Graham Fisher is part of our editorial team and reviews and edits our solar generators for home backup & emergencies guides, checking product details against manufacturer specifications and owner feedback.