 By Emily Parker
Updated November 2026
Solar panels for EcoFlow Delta Pro give you a way to recharge the battery when the grid is down or when you want to run off-grid for a few days. This guide walks you through how to match panel wattage to the unit’s solar input limit, how to estimate real-world charge times, how to wire panels safely, and what to avoid. By the end, you should be able to pick a panel setup that fits your backup goals instead of guessing.
What the EcoFlow Delta Pro Accepts for Solar Input
Before you buy any panel, check the maximum solar input the power station is rated to accept. The Delta Pro is designed to take a substantial amount of solar input through its dedicated solar ports, but the exact ceiling, voltage window and current limits are listed in the official specifications for your specific model and firmware. Manufacturers typically specify a maximum input wattage, a voltage range for the MPPT controller, and a maximum input current per port. Those three numbers decide what panels will work.
Shopping for one? See our guide: 7 Best Ecoflow Delta 2 Max Solar Panels for Home Backup (2026).
Read the spec sheet before shopping. Look for these items:
- Maximum solar input power in watts (total across all ports)
- Per-port or per-input maximum wattage, if separately listed
- Operating voltage range for solar input (often expressed as an open-circuit voltage ceiling)
- Maximum input current per port
- Connector type, which determines the cables you need
If you exceed the open-circuit voltage ceiling, you risk damaging the input. Panels wired in series raise voltage, while panels wired in parallel raise current. Keep both within the limits the manufacturer publishes.
Step 1: Decide What You Need to Power
Solar panels only matter in relation to your loads. Start by listing what the Delta Pro will run during an outage and how many watt-hours each device uses per day. A typical home backup list for a unit of this class might include a refrigerator, a CPAP machine, a sump pump, Wi-Fi equipment, LED lighting and a phone or laptop.
- Find each device’s wattage on its label or manual.
- Estimate daily run time in hours.
- Multiply watts by hours to get watt-hours (Wh) per day for each device.
- Add the totals and add roughly 15 to 20 percent for inverter and conversion losses.
Refrigerators cycle on and off, so their real average draw is lower than the nameplate rating, but many people use a cautious estimate for planning. A sump pump is different: it runs in short, high-draw bursts, so its surge rating matters more than its daily energy use. For medical devices such as CPAP machines, confirm runtime with the device maker and the power station’s documentation, and consult your medical provider before relying on any backup setup.
Step 2: Match Panel Wattage to Your Charge Goal
The number of panels is less important than the total wattage you connect, as long as it stays within the input limit. Real output from a panel is usually well below its rated wattage because of sun angle, temperature, shading, dust and cable losses. Planning around roughly 60 to 75 percent of rated panel output over a typical day gives a more realistic picture.
Use this rough formula:
Estimated daily solar energy (Wh) = Total panel watts × peak sun hours × 0.7
Peak sun hours vary by location and season. Many parts of the continental US average somewhere between about 3 and 6 peak sun hours per day, with winter values lower in northern states. Check local solar resource data before assuming a number.
| Total Panel Watts | Peak Sun Hours | Estimated Daily Solar Energy (Wh) |
|---|---|---|
| 400 W | 4 | About 1,120 Wh |
| 800 W | 4 | About 2,240 Wh |
| 1,200 W | 4 | About 3,360 Wh |
| 800 W | 3 | About 1,680 Wh |
| 800 W | 6 | About 3,360 Wh |
If your daily load is about 2,000 Wh and you average 4 peak sun hours, roughly 800 W of panels gets you close to replacing a full day’s use under good conditions. Add margin if you live in a cloudy area or want to keep the battery topped up during extended outages.
Step 3: Choose the Right Panel Type
Panels for portable power stations generally come in three forms:
- Rigid monocrystalline panels offer good efficiency for their size and are common for permanent or semi-permanent mounting.
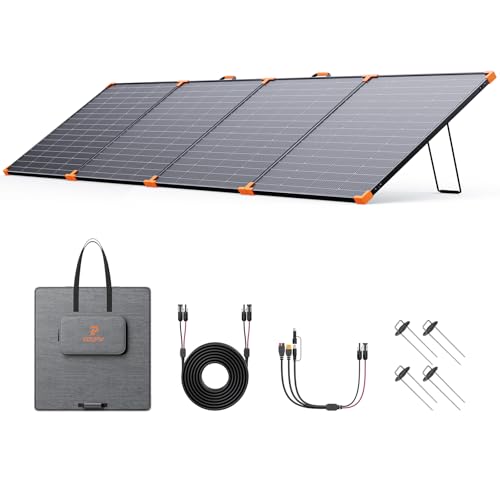
- Portable foldable panels with a case and kickstand are easy to set up in a yard or on a patio and move as the sun shifts.
- Flexible panels are lightweight and work on curved or irregular surfaces, though they often run warmer and may be less efficient than rigid designs.
For most home backup use, foldable portable panels offer the best balance of flexibility and setup speed. If you plan to leave panels on a roof or rack, rigid panels with proper mounting hardware usually last longer outdoors.
Step 4: Check Voltage and Current Compatibility
This step prevents the most expensive mistakes. For each panel or string, confirm:
- The open-circuit voltage (Voc) at the coldest temperature you expect. Cold weather raises Voc, so a panel rated near the limit on a warm day can exceed it in winter.
- The short-circuit current (Isc) and whether the total current from parallel strings stays within the port’s rating.
- The total wattage across all connected panels, which must stay under the unit’s maximum solar input.
Series wiring adds voltage. Parallel wiring adds current. Mixing panels of different ratings or ages in the same string can reduce output, so use panels from the same model or series when possible.
Step 5: Select Cables and Connectors
The cable between each panel and the power station must match the connector type on both ends and be rated for the current and length you plan to run. Thin or undersized cables cause voltage drop and heat. Keep cable runs as short as practical, and use the gauge recommended by the panel or power station maker for your distance.
Use only connectors the manufacturer specifies. Mismatched connectors can fit loosely, arc and overheat. Inspect connectors for corrosion and seal outdoor connections against water.
Step 6: Set Up and Wire the System Safely
- Turn the power station off and disconnect any loads before adjusting wiring.
- Place panels in a location with unobstructed sun, away from shade from trees, chimneys and nearby structures.
- Angle panels toward the sun. In the Northern Hemisphere, a south-facing orientation is common, and tilt is often set near your latitude for year-round use.
- Connect panels to the solar input, starting with one panel to confirm the unit detects input before adding more.
- Check the app or display to verify input wattage and charging status.
- Secure cables so they cannot be pulled, stepped on or exposed to standing water.
If you plan a permanent roof installation or connect panels to your home’s electrical system, work with a licensed electrician. Interconnection with a house panel involves code requirements that a portable setup does not.
Step 7: Estimate Charge Times
To estimate how long the Delta Pro takes to recharge from solar, divide the battery’s usable capacity by the average solar power you actually receive. Include losses, and remember that charging slows near full capacity. Your real charge curve will be slower at the top end than at the start.
For example, if the battery has about 3,000 Wh of usable capacity and your panels average 500 W of real output over a sunny afternoon, the rough time is about six hours of good sun, plus extra for conversion losses and the slower top-off phase. Plan for more time on cloudy days. A related read: 5 Best EcoFlow Delta Pro Generator Options for Home Backup (2026).
Common Mistakes
- Connecting more total panel wattage than the unit’s maximum solar input, which can trigger protection or limit output.
- Ignoring cold-weather voltage increase and exceeding the open-circuit voltage ceiling in winter.
- Using undersized cables for long runs, leading to voltage drop and heat.
- Mixing unmatched panels in one string and expecting full output.
- Placing panels in partial shade, which can cut output far more than the shaded area suggests.
- Forgetting that rated panel wattage is a best-case value, not a daily average.
- Leaving connectors exposed to rain or dirt without weather sealing.
Tips for Better Results
- Clean panels regularly, since dust and pollen reduce output noticeably.
- Adjust tilt seasonally if you can, or at least check it in spring and fall.
- Track real charging data in the app for a few sunny days to learn your actual numbers.
- Keep the battery in a moderate temperature range; very hot or cold conditions reduce charging efficiency.
- Plan for a cloudy-day buffer by charging fully from the grid or a generator before a forecast storm.
Recommended gear
A few supplies make a portable solar setup easier to run and safer to maintain.
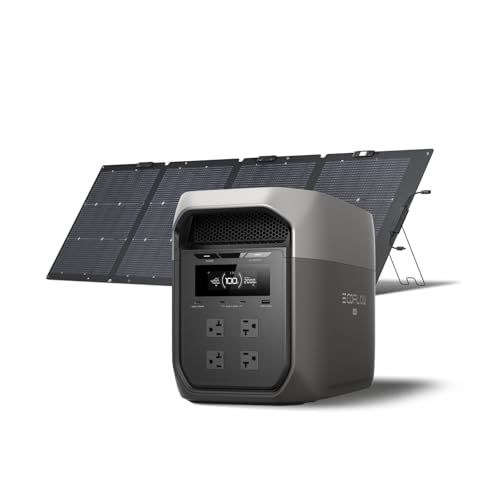
- EcoFlow 400W Portable Solar Panel is a foldable option sized to pair with the Delta Pro’s solar input, useful when you want a plug-and-play starting point. View on Amazon
- Renogy 100W Solar Panel Starter Kit is a practical choice for adding a smaller panel to an existing array or testing your setup before scaling up. View on Amazon
- Klein Tools Digital Multimeter lets you measure open-circuit voltage and current on each string before connecting, which helps you stay inside input limits. View on Amazon
FAQ
How many solar panels can I connect to an EcoFlow Delta Pro?
The number depends on the total wattage, the unit’s maximum solar input, and each panel’s voltage and current ratings. Check the official specifications for your model, then add up total watts and confirm voltage and current stay within the stated limits.
Can I use any solar panel with the Delta Pro?
Not automatically. The panel must match the connector type, voltage window and current limits of the solar input. Using a panel outside those specifications can damage the unit or simply prevent charging.
How long does it take to charge the Delta Pro with solar?
It depends on usable battery capacity, real panel output, sun conditions and charging losses. Divide the battery’s usable capacity by average solar power received, then add time for conversion losses and the slower final charge stage.
Will panels charge the Delta Pro on cloudy days?
Yes, but output drops significantly under heavy cloud cover. Plan for reduced charging on overcast days, and top up from the grid or a generator before a forecast outage if you can.
Do solar panels work in winter?
They do, though daylight hours are shorter and sun angle is lower in many areas. Cold also raises open-circuit voltage, so check that your panel string stays within the input voltage limit on the coldest days.
Should I use series or parallel wiring?
Series wiring raises voltage and parallel wiring raises current. Choose the configuration that keeps both voltage and current within the power station’s limits. When unsure, consult the manufacturer’s wiring guidance or a qualified installer.
Can I power medical equipment from solar alone?
Some people do, but medical devices have specific power needs and backup requirements. Consult your medical provider and the device manufacturer before relying on solar for critical equipment, and consider having a secondary backup plan.
Conclusion
Solar panels for EcoFlow Delta Pro work best when you start with your actual daily energy needs and the unit’s published input limits. Match total panel wattage to those limits, estimate real-world output using realistic sun hours, and wire everything with compatible cables and connectors. Check voltage carefully in cold weather, keep panels clean and unshaded, and verify performance in the app during your first few sunny days.
Related reading
- 6 Best Ecoflow Delta 3 Classic Solar Panel Options for Home Backup (2026)
- Ecoflow Delta Pro Ultra X Price: A Practical Guide (2026)
- Ecoflow Delta 3 Classic Review (2026): Specs, Pros and Cons
Ready to choose one?
About Emily Parker
Emily Parker is part of our editorial team and reviews and edits our solar generators for home backup & emergencies guides, checking product details against manufacturer specifications and owner feedback.